A detailed walkthrough of a complete Melbourne, FL home interior repaint, from initial consultation and color selection through surface prep and final reveal. Representative of our typical projects.
Note: This project walkthrough is representative of the type of work RPB Painting LLC performs for clients in Brevard County. Details are typical of similar projects completed for Melbourne area homeowners. Photos of actual completed projects are available in our project gallery.
The best way to understand what professional interior painting can accomplish is to walk through a real project from start to finish. The decisions, challenges, and results in this case study are typical of what we see and deliver in Melbourne-area homes, because the approach we take on every job is the same.
The Home: A Melbourne East Side Property
The project was a 2,200 sq ft, 3-bedroom, 2-bathroom CBS stucco home in Melbourne's east side, a neighborhood of predominantly 1990s and early 2000s construction, with standard open-plan living and kitchen areas, vaulted ceilings in the main living space, and ceramic tile throughout the common areas.
The homeowners, a couple in their mid-40s who had lived in the home for 11 years, wanted a full interior refresh. The existing paint was the original builder-grade finish applied when the home was constructed. While structurally sound in most areas, the paint had:
- Yellowed and faded from 11 years of Florida UV exposure
- Accumulated scuffs, marks, and touch-up patches throughout the high-traffic areas
- Developed visible moisture-related peeling near the master bathroom shower
- Become visually dated, flat, chalky, lacking the warmth and depth the homeowners wanted
Scope of work:
- 4 bedrooms (walls and ceilings)
- 2 full bathrooms
- Open-plan living room and dining room
- Kitchen
- All hallways and entryway
- All interior trim and doors throughout
Total paintable surface area: Approximately 5,800 sq ft of wall and 2,100 sq ft of ceiling
Project timeline: 5 days with a 4-person crew
Step 1: The Initial Consultation and Walkthrough
The project started with a thorough pre-job assessment, something that separates professional contractors from the cut-and-run approach common among unlicensed operators. Before a single price was quoted, our lead painter walked every room, noting surface conditions, moisture issues, and any factors that would affect preparation requirements or the final result.
What we found during the walkthrough:
- Master bathroom: Paint peeling near the shower surround, classic sign of long-term moisture exposure. Required a mold-killing primer (Zinsser Mold Killing Primer) before the finish coat, and we recommended a mildew-resistant paint formulation for that room.
- East-facing bedroom: Significant UV fading on the two exterior walls; the paint had yellowed to a noticeable degree. Required extra priming to prevent bleed-through of the old yellow tint into the new white.
- Kitchen ceiling: Grease buildup above the stove created a visible color difference. Required a degreaser wash followed by shellac-based primer to seal the stain before the finish coat.
- Hallway: Previous touch-up patches applied in the wrong sheen (gloss instead of eggshell) left visible patches visible in raking light. Required feathering and spot priming to eliminate the sheen difference.
- Living room ceiling: A hairline crack running horizontally, likely from seasonal roof movement. Filled with flexible joint compound, sanded, and primed before painting.
All of these findings were communicated clearly in the written quote. The homeowners knew exactly what work would be done and why. There were zero change orders during the project, everything that needed addressing had been identified upfront.
Step 2: Color Selection
The homeowners came to the color consultation with a clear direction: warm, fresh, and a departure from the builder-grade white that had defined the home for a decade. They'd saved inspiration images on their phones, mostly warm whites, soft greens, and one bold blue-green for the master bedroom.
We spent about 30 minutes reviewing Benjamin Moore samples, discussing how each color would look in the specific light conditions of each room, and narrowing down options. The process:
- We pulled 8–10 sample chips in the color families they liked
- We discussed directional light for each room (the master bedroom gets east-facing morning light; the living room has a large west-facing window)
- We recommended testing 2 finalists in each major space before committing
- We ordered sample pots and applied them at 12"×12" patches in each room
After reviewing samples over a weekend, the final color plan was confirmed:
| Room | Color | Product |
|---|---|---|
| Living / Dining Room | Benjamin Moore Pale Oak (OC-20) | Aura, Eggshell |
| Kitchen | Benjamin Moore White Dove (OC-17) | Aura, Satin |
| Master Bedroom | Benjamin Moore Quiet Moments (AF-210) | Aura, Eggshell |
| Bedroom 2 | Benjamin Moore Pale Vista (868) | Aura, Eggshell |
| Bedrooms 3 & 4 | Benjamin Moore White Dove (OC-17) | Aura, Eggshell |
| Bathrooms | Benjamin Moore Simply White (OC-117) | Aura Bath & Spa, Satin |
| Hallways / Entryway | Benjamin Moore Pale Oak (OC-20) | Aura, Eggshell |
| All Trim & Doors | Benjamin Moore Chantilly Lace (OC-65) | Advance, Semi-Gloss |
| All Ceilings | Benjamin Moore Chantilly Lace (OC-65) | Ceiling Flat |
The decision to use Chantilly Lace on both ceilings and trim, rather than a standard ceiling white, was our recommendation. It creates visual cohesion between the ceiling plane and the trim work, making the room feel more architecturally intentional. It also means the ceiling and trim share the same white reference point, so there's no awkward color jump between them.
Step 3: Surface Preparation
Preparation is where professional painting separates itself from a DIY job, or from a cheap contractor who skips it. On this project, surface prep took roughly a third of the total project time.
What our crew completed during prep:
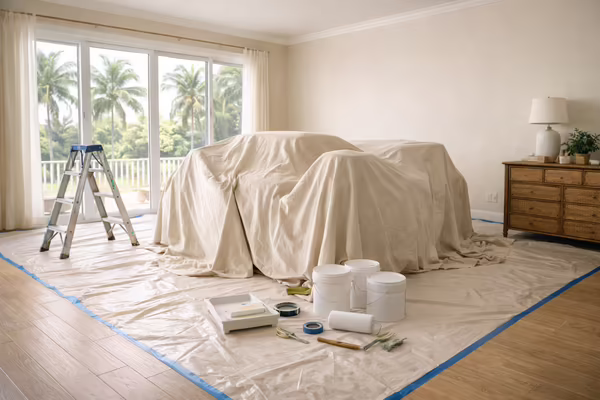
- Protected all floors with canvas drop cloths; plastic sheeting used under paint trays and around baseboards
- Removed all switch plates, outlet covers, and vent covers
- Filled approximately 34 nail holes, wall anchors, and small dents throughout the home with lightweight spackle
- Repaired the living room ceiling hairline crack with flexible joint compound, sanded smooth
- Applied Zinsser Mold Killing Primer to the master bathroom moisture-damaged areas
- Degreased and shellac-primed the kitchen ceiling above the stove
- Spot-primed the hallway touch-up patches to normalize sheen before finish coating
- Applied extra primer coat to the east-facing bedroom's UV-faded walls to block yellowing bleed-through
- Caulked all trim-to-wall joints throughout the home (this had never been done, the original builder left gaps)
The caulking step alone made a visible improvement: clean, sharp lines between the trim and freshly painted walls look professional in a way that's immediately obvious even to untrained eyes.
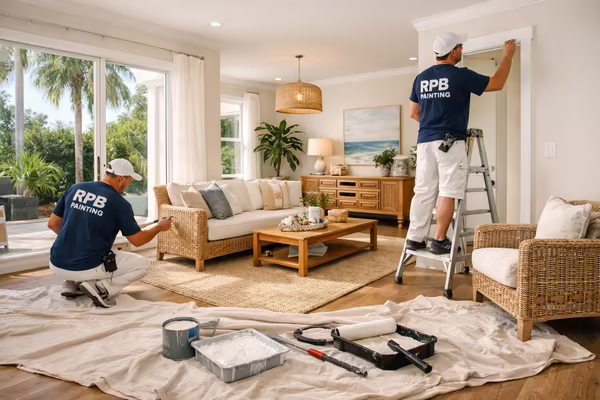
Step 4: Painting
With prep complete, the crew moved into painting, ceilings first (throughout the full home in sequence), then walls in order of room priority, then trim and doors last. Working in this sequence means any ceiling splatter onto walls is covered by the wall coat, and any wall splatter onto trim is covered by the trim coat. It's an ordered process that experienced painters follow instinctively.
Benjamin Moore Aura was the product used throughout. At roughly $85–95 per gallon, Aura is a premium product, but on a whole-home project, the difference in coverage, color consistency, and hide means fewer coats in most cases. On this project, all rooms received two coats (primer coat already counted where applied), the industry standard for a professional finish.
The crew provided end-of-day updates to the homeowners, including photos of completed rooms. The homeowners were not asked to be present during painting, professional crews don't require supervision, but were invited to check progress anytime.
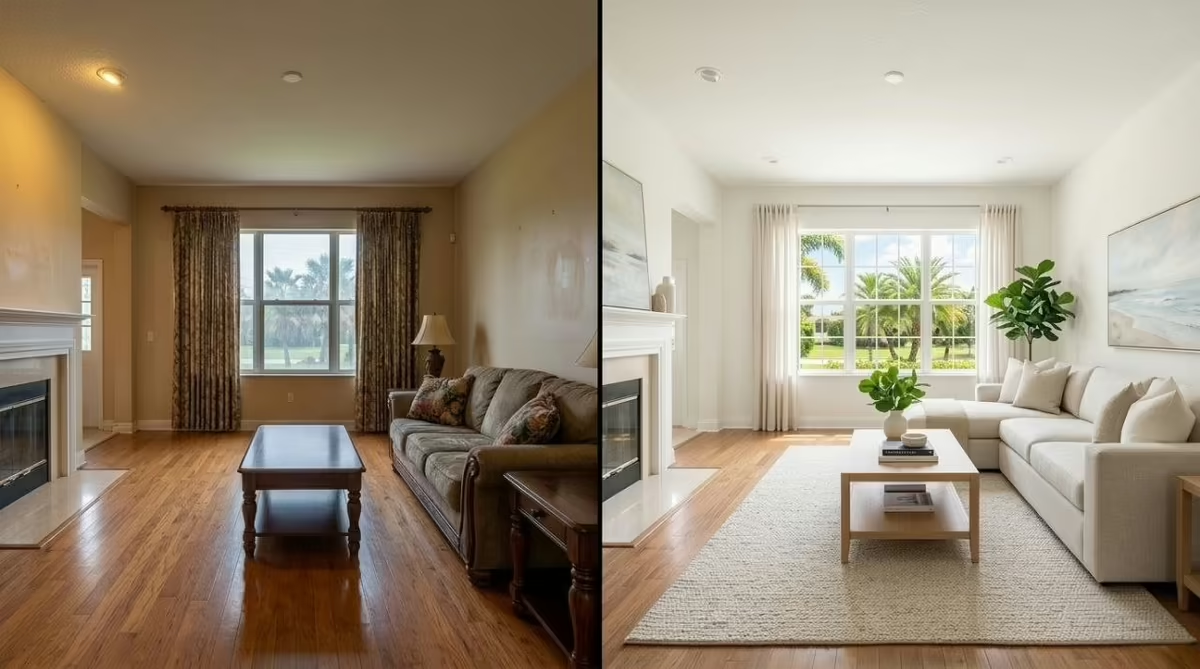
Step 5: The Transformation
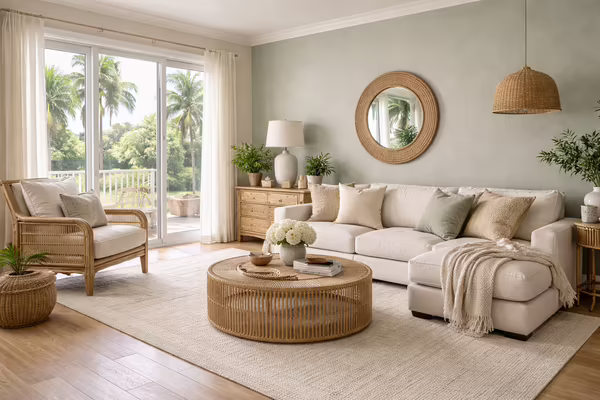
By Day 3, the living and dining room were complete. The combination of Pale Oak walls and Chantilly Lace trim created a warmth and visual cohesion the home had never had with its original builder white. The identical Chantilly Lace on both the ceiling and trim, our recommendation, made the room feel taller, the architectural details more intentional.
The master bedroom's Quiet Moments blue-green was the biggest surprise of the project. On the chip it looked potentially risky, potentially too bold, too blue. In the actual room, with east-facing morning light, it created a serene, spa-like quality that the homeowners immediately loved. The husband's words on Day 4 when we opened the room: "This is the first time in 11 years I've actually liked being in this room."
The kitchen White Dove transformation was the most before-and-after dramatic room. The previous off-white had yellowed to the point where it made the kitchen feel perpetually dim and dated. The fresh White Dove in satin finish reflected light beautifully, made the stainless appliances look crisper, and transformed the kitchen into the bright, clean space it was always supposed to be.
The final walkthrough produced zero punch list items, no missed spots, no drips, no lap marks, no paint on trim or floors. The homeowners signed off on the same day the crew completed the final room.
What Made This Project Successful
After the final walkthrough, we asked the homeowners what they felt had made the project go well. Their answers were consistent with what we hear on most successful projects:
- The pre-job walkthrough identified every surface issue before work began, no surprises during the project
- The written, itemized quote created clear expectations and there were no change orders
- The color consultation gave them confidence in their color choices before any paint was purchased
- The daily end-of-day updates from the lead painter kept them informed without requiring them to be present
- Benjamin Moore Aura delivered colors that matched the sample chips exactly, something that's not guaranteed with lower-grade paints
- The caulking step (which they hadn't specifically requested but was included in our standard process) produced sharp, professional lines that elevated the quality of the whole project
Is a Full Interior Repaint Worth It?
For this family, the answer was unambiguously yes. They had lived in the same home for 11 years with the same original paint. The refresh fundamentally changed how they experienced their space. They plan to stay for another decade, the $9,400 investment works out to roughly $850 per year, making it arguably the best return on investment available short of a full renovation.
The math is simple: a whole-home interior repaint costs a fraction of what any structural renovation costs, delivers an immediate and complete transformation, and extends the functional life of your surfaces by 8–12 years with premium paint.
If you're considering a full interior repaint for your Brevard County home, we'd love to do the same thorough walkthrough, give you an honest assessment of your surfaces, and help you choose colors that will look extraordinary in your specific home. Browse our project gallery to see more completed work, then contact us for a free estimate. We serve Melbourne, Palm Bay, Viera, and all of Brevard County.